
Welcome to The Ultimate Guide: How to Make Dessert Shells for Strawberry Shortcake. If you’ve ever wanted to make a unique and impressive dessert for a special occasion, look no further. This guide will teach you how to make beautiful and tasty dessert shells that are perfect for any celebration. With just a few simple ingredients, you can make these stunning desserts in no time at all. So grab your ingredients and let’s get started!Making dessert shells is a fun and easy way to add a delicious sweet treat to your next gathering. These edible, crispy treats can be made in a variety of shapes and flavors, and can be filled with all sorts of delicious fillings. With just a few simple steps, you’ll be ready to make your own tasty dessert shells in no time at all!
First, you’ll need to gather the ingredients for your dessert shells. You will need some type of flour or dough, such as pie crust or puff pastry dough. You will also need butter or margarine for added flavor and texture. Additionally, you may want to add sugar or other seasonings for extra sweetness.
Next, you’ll need to prepare the dough for baking. Roll out the dough on a lightly floured surface and cut it into desired shapes with a knife or cookie cutter. Then, place the shapes on a parchment-lined baking tray and brush them lightly with melted butter or margarine. Sprinkle on any additional seasonings if desired. Bake the shells according to the recipe instructions until they are golden brown and crispy.
Finally, it’s time to enjoy your freshly made dessert shells! Serve them as-is for an easy snack, or stuff them with fruit and whipped cream for an elegant sweet treat. Whatever you choose to fill them with, these delicious treats are sure to be a hit!
Choosing the Right Ingredients
Cooking the perfect meal requires more than just a great recipe – it also requires the right ingredients. When it comes to selecting the right ingredients for a dish, there are a few key considerations to keep in mind.
First and foremost, you’ll want to make sure that you select ingredients that will work well together. If you’re making a soup, for instance, it’s important to choose ingredients that will complement each other in terms of flavor and texture. Additionally, if your recipe calls for a particular type of ingredient, such as a specific type of cheese or vegetable, make sure you select one that is fresh and of good quality.
It’s also important to consider the nutritional value of your ingredients. Be sure to look for healthy options such as lean meats, whole grains, and fresh fruits and vegetables. You should also be mindful of food allergies and dietary restrictions when selecting ingredients; there are many substitutions available that can help accommodate different dietary needs without sacrificing flavor or texture.
Finally, don’t forget about presentation when choosing ingredients! Selecting colorful food items can help make your dish look more appealing on the plate and can even enhance the flavors. For example, adding fresh herbs or bright vegetables like bell peppers can add both flavor and color to your meal!
Choosing the right ingredients is an essential part of creating any successful dish. By taking the time to consider all aspects – from flavor combinations to nutrition – you’ll be able to create delicious meals with ease!
Preparing the Batter
Making the perfect pancake batter is key to getting fluffy, delicious pancakes. The ingredients are simple – all-purpose flour, baking powder, salt, sugar, milk, eggs and melted butter. Start by sifting together the flour, baking powder and salt into a bowl. Then stir in the sugar. In a separate bowl, whisk together the milk and eggs until well blended. Add this mixture to the dry ingredients and whisk until just combined. Finally add melted butter and continue to whisk until everything is fully incorporated. Your batter should be thick and lump-free.
Now your pancake batter is ready for cooking! Heat a lightly oiled griddle or frying pan over medium high heat. Pour or scoop the batter onto the griddle in small circles for individual pancakes or one large circle for a large pancake. Cook until golden brown on each side before transferring to a plate and topping with your favorite syrup or fruit toppings. Enjoy!
Making the Dough
Making the dough for biscuit shells is a relatively simple process. First, you will need to gather all of the necessary ingredients such as flour, baking powder, sugar, and salt. Once these have been gathered, mix them together in a large bowl until they are well combined. You may need to add a small amount of cold water or milk to help the dough come together correctly. Once it has been mixed together, knead it on a lightly floured surface until it is soft and pliable. Finally, form it into a ball before wrapping it in plastic wrap and placing it in the refrigerator for an hour or two to rest.
Rolling Out and Cutting
Once the dough has been chilled and rested, you can begin rolling out the dough on a lightly floured surface. You should roll the dough out until it is approximately 1/4 inch thick then cut out circles with a biscuit cutter or glass tumbler. Place these circles onto an ungreased baking sheet and repeat with any remaining dough scraps.
Baking
Once your shells have been cut out and placed on the baking sheet, they are ready for baking! Preheat your oven to 425 degrees Fahrenheit and place the baking sheet in the oven for 10-12 minutes until golden brown. Once finished baking, transfer them onto a wire rack to cool completely before filling.
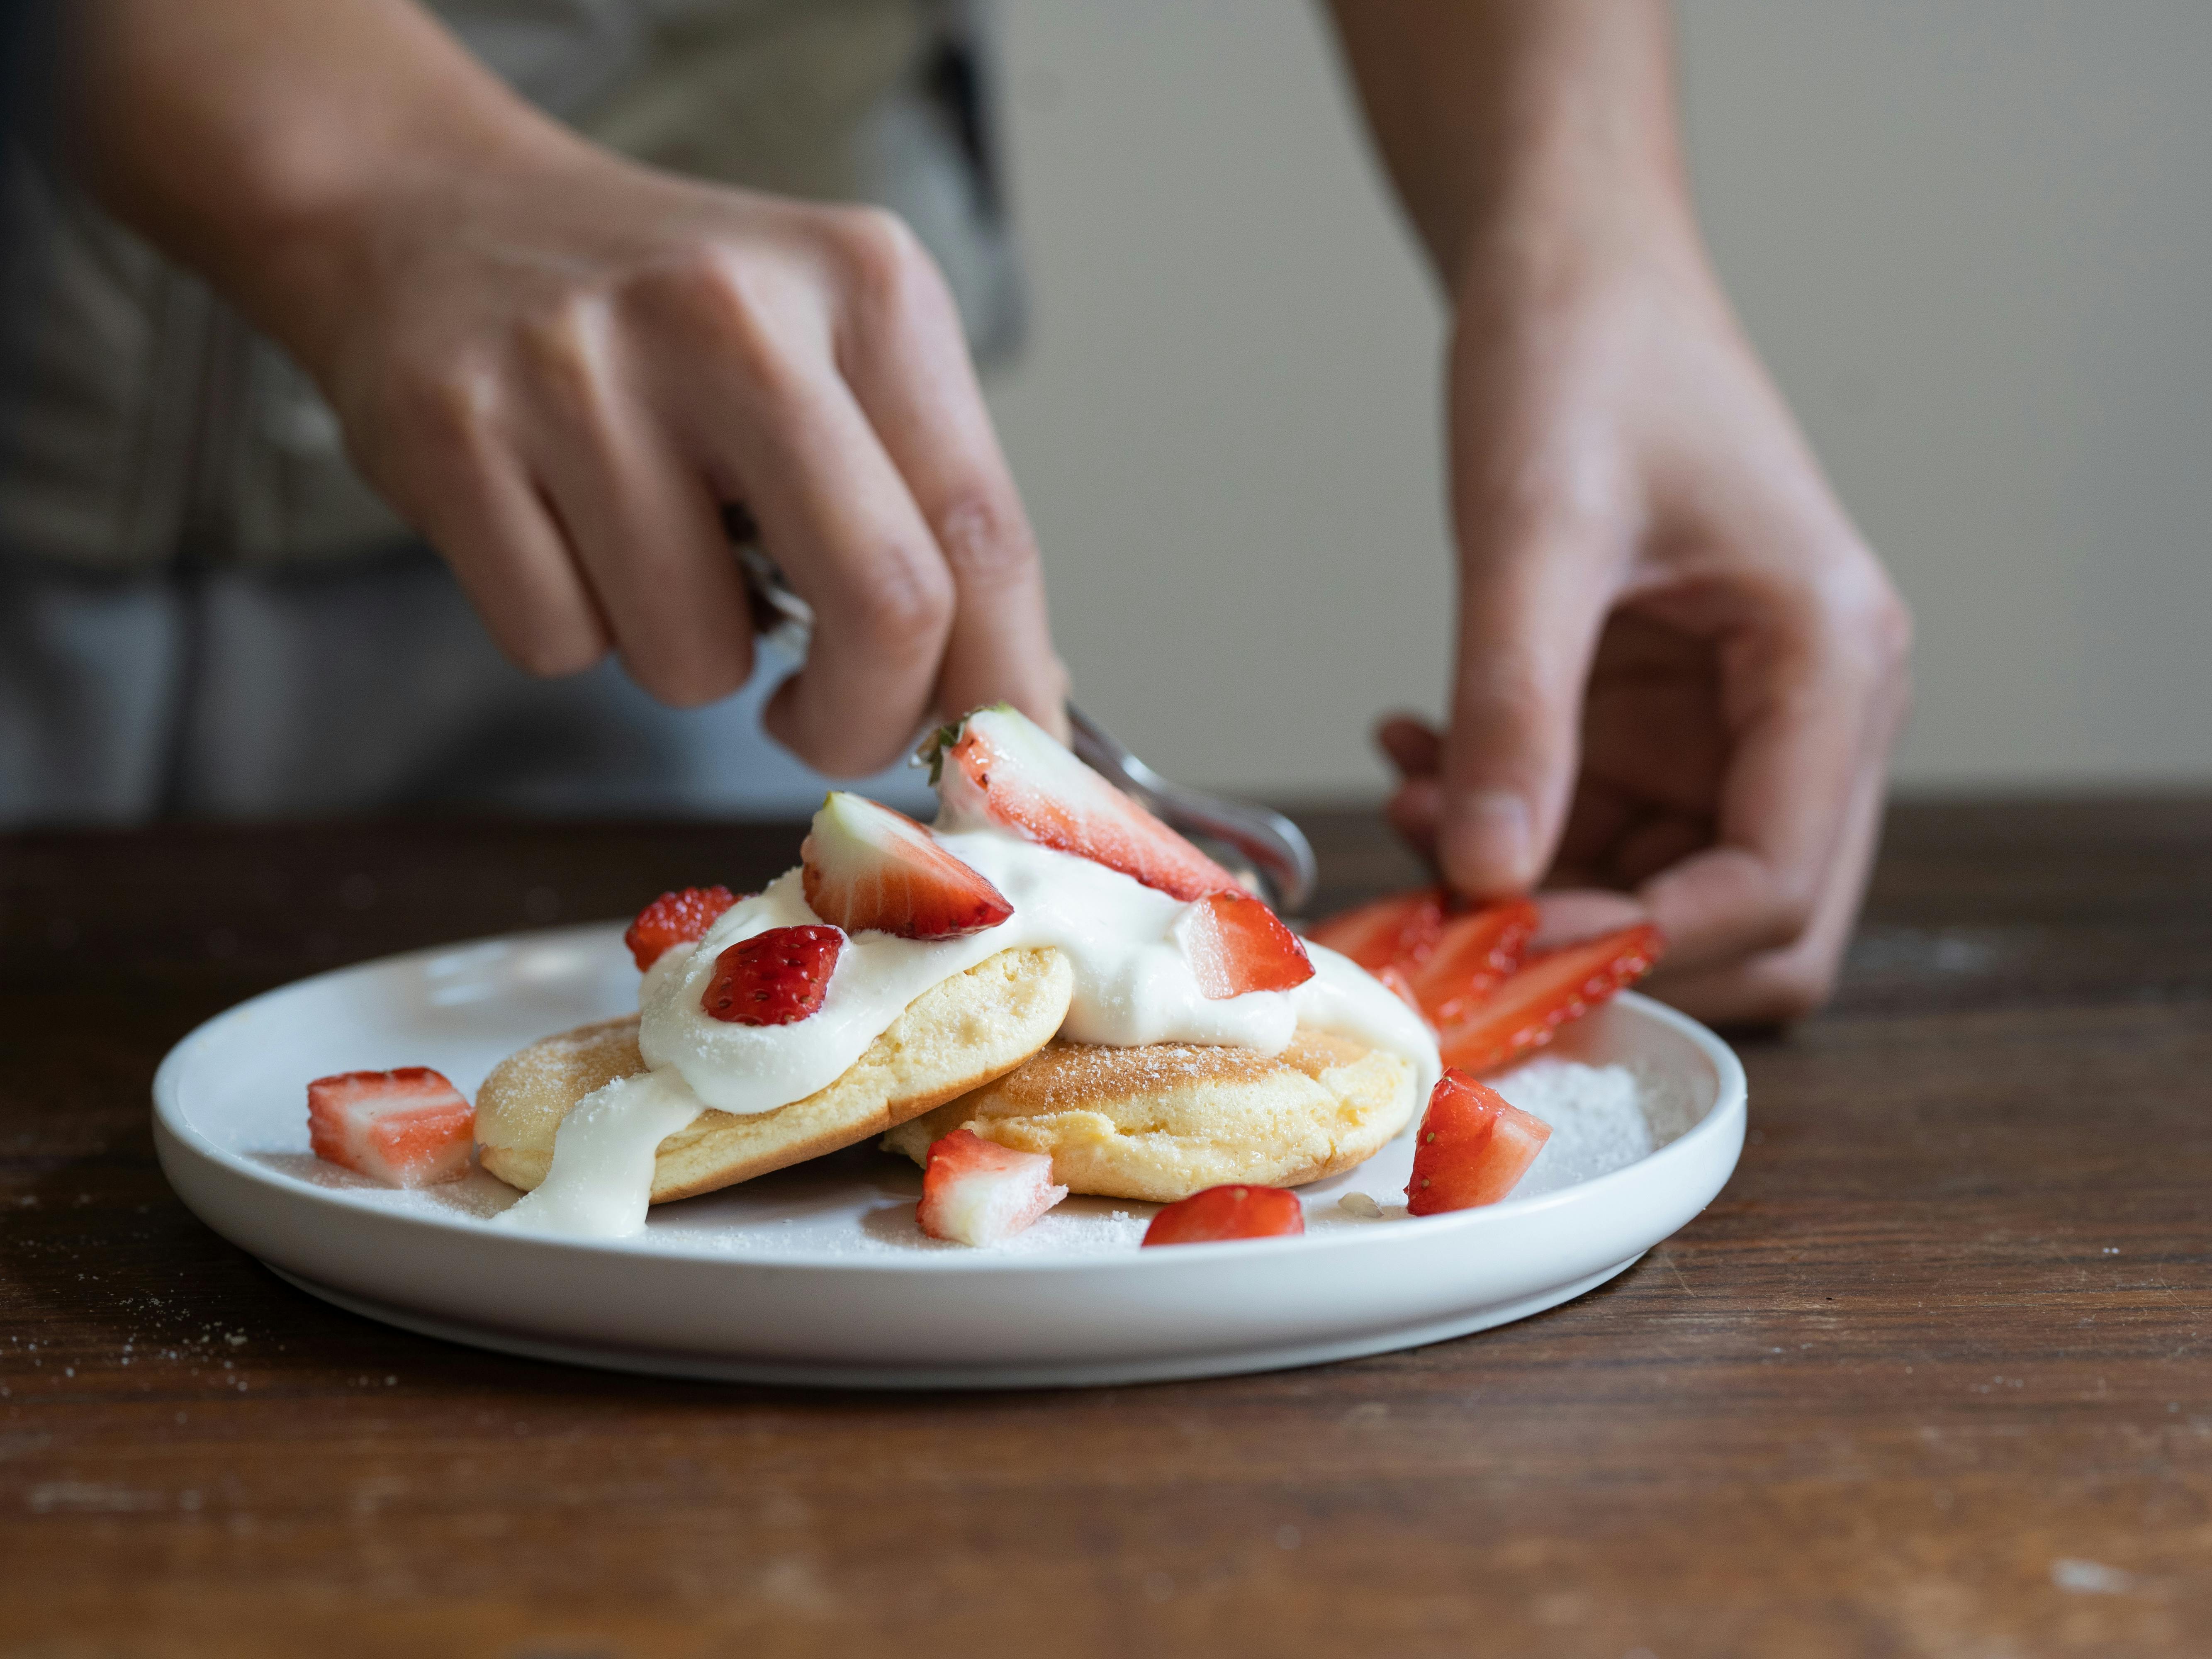
Filling and Shaping The Shells
At this point you can either fill your shells with sweet or savory fillings depending on your preference. If using sweet fillings such as jam or cream cheese icing, pipe them into each shell using a pastry bag or spoon them in carefully with a small spoon. For savory fillings like egg salad or tuna salad, simply spoon them into each shell carefully until filled evenly. Finally, shape each biscuit by pressing down gently on one side of each filled shell until flattened slightly at one end.
Making the Dough
Making dessert shells can be an enjoyable activity, especially if you like to bake. To start, gather all of your ingredients together and measure them out accurately. Begin by combining the butter and sugar together in a bowl until it is light and fluffy. Add in the egg and mix until fully incorporated. Then sift together the dry ingredients – flour, baking powder, and salt – into the wet mixture. Mix until all of the ingredients are combined into a soft dough. Wrap the dough in plastic wrap and refrigerate for 30 minutes before rolling it out.
Rolling Out The Dough
Once the dough has chilled in the refrigerator for 30 minutes, it is ready to be rolled out. Remove from refrigerator and place onto a lightly floured surface. Use a rolling pin to roll out to about 1/4 inch thick. Cut out circles or other shapes with cookie cutters of your choice. Place each shape onto a parchment-lined baking sheet, making sure to keep them at least 1 inch apart from each other so they don’t stick together while baking. Bake in preheated oven at 375°F for 8-10 minutes or until lightly golden brown around edges.
Baking The Dessert Shells
Once shells are done baking, remove from oven and cool on wire rack for 10 minutes before transferring to cooling rack to cool completely. Once cooled, fill with desired filling or enjoy as is! Decorate with sprinkles or dust with confectioners’ sugar if desired before serving. Enjoy!
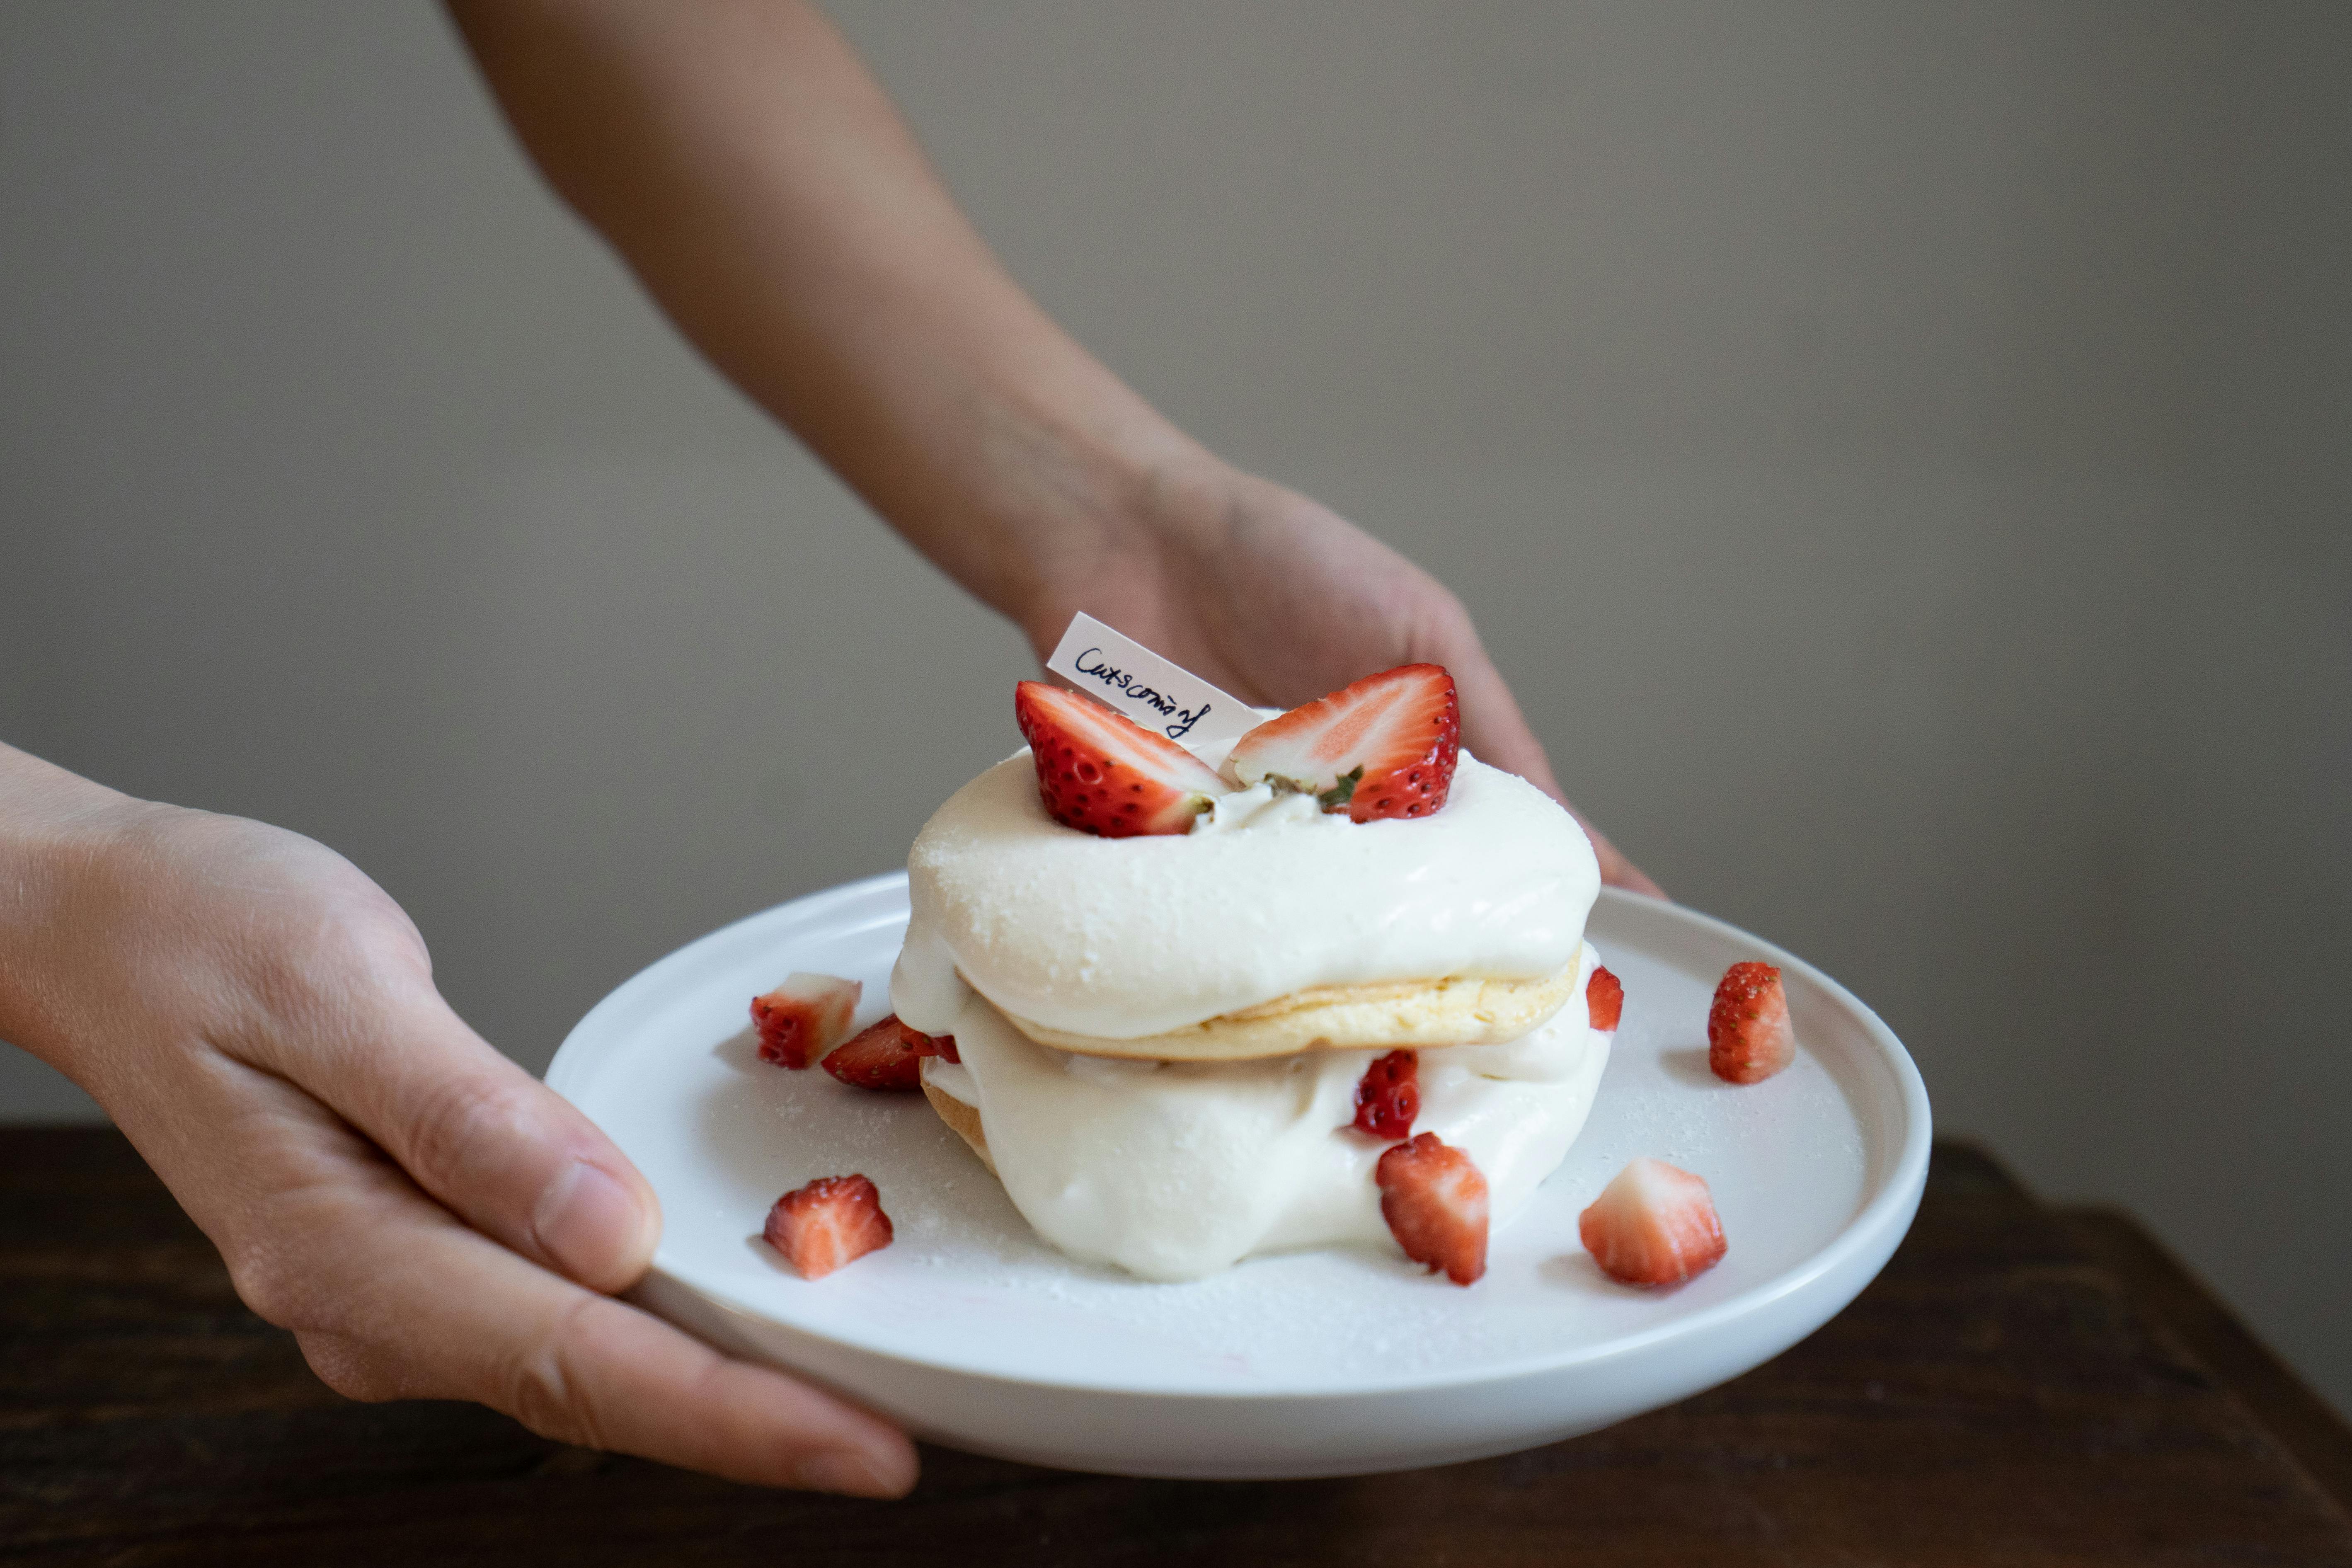
Making the Filling for Strawberry Shortcake
Making the filling for strawberry shortcake is easy and requires just a few ingredients. Begin by combining one cup of heavy cream, two tablespoons of confectioners’ sugar and a teaspoon of vanilla extract in a medium bowl. Beat the mixture with an electric mixer until stiff peaks form. Gently fold in one pint of fresh strawberries that have been hulled and sliced thinly. Refrigerate the mixture while you prepare the cake.
To assemble the strawberry shortcake, split a pre-baked angel food or pound cake horizontally to make two layers. Place one layer on a serving plate and spread half of the filling over it. Top with the other layer of cake and spread the remaining filling over it. To finish, garnish with additional sliced strawberries or decorate with piped whipped cream, if desired. Serve immediately or store in the refrigerator until ready to serve. Enjoy!
Assembling Your Strawberry Shortcake
Start by preheating your oven to 350 degrees. Take the frozen pie crust out of the box and place it on a lightly floured surface. Roll out the dough until it is about 1/4 inch thick. Cut two circles, each one about 8 inches in diameter, from the dough. Place one of the circles in an 8-inch pie pan and press out any air bubbles with your fingers.
In a medium bowl, combine 1/2 cup of sugar and 2 tablespoons of cornstarch with 3 cups of fresh or frozen strawberries. Stir until the fruit is evenly coated with sugar and cornstarch mixture. Spoon the strawberry mixture into the pie crust lined pan, leaving any excess liquid in the bowl.
Place the second circle of dough on top of the strawberry mixture and press down around the edges to seal it together. Make a few small slits in top of crust to allow steam to escape while baking. Brush top of crust with melted butter and sprinkle with remaining tablespoon of sugar.
Bake for 40-45 minutes or until crust is golden brown and filling is bubbling through slits. Allow to cool completely before serving, about 2 hours at room temperature or 1 hour in refrigerator. Enjoy your homemade Strawberry Shortcake!
Decorating Your Strawberry Shortcake
Strawberry shortcake is a classic dessert that is sure to please. It’s easy to make, and fun to decorate! Here are some tips for decorating your strawberry shortcake so it looks even more delicious.
For a classic look, top your cake with fresh strawberries and a dollop of whipped cream. You can also sprinkle some chopped nuts on top for added crunch. If you want to get creative, you can use different fruits and berries like raspberries, blueberries, or blackberries. You can also add edible flowers for an extra special touch.
If you’re feeling adventurous, why not try using different flavors of frosting? You could use white chocolate, dark chocolate, or even caramel. Make sure to keep the colors complementary so that the cake looks as pretty as it tastes!
Another way to make your strawberry shortcake stand out is by adding decorations such as sprinkles or edible glitter. This will give your cake a unique look and make it even more eye-catching.
Finally, don’t forget the little details! Adding a few decorative touches such as fresh mint leaves or candy pearls will really take your strawberry shortcake up a notch.
These are just some ideas for decorating your strawberry shortcake and making it look beautiful. With a little creativity and imagination, you’ll be sure to create an impressive dessert that everyone will love!
Conclusion
Dessert shells are a delicious way to enjoy strawberry shortcake. With the right ingredients and tools, you can make a variety of different desserts that everyone will love. From classic recipes to creative twists, dessert shells offer something for everyone. Whether you’re baking for a special occasion or just want to enjoy a sweet treat, these recipes will help you create delicious desserts in no time.
Whether you’re an experienced baker or new to the kitchen, these recipes are easy enough for anyone to follow. With just a few simple steps, you can make an impressive dessert that is sure to impress your family and friends. So why not give it a try and whip up some delicious dessert shells today?
Making dessert shells is a great way to enjoy strawberry shortcake without too much hassle. With the tips and recipes outlined in this guide, you can easily make your own homemade version of this classic treat. So what are you waiting for? Get baking and enjoy some delicious strawberry shortcake today!

