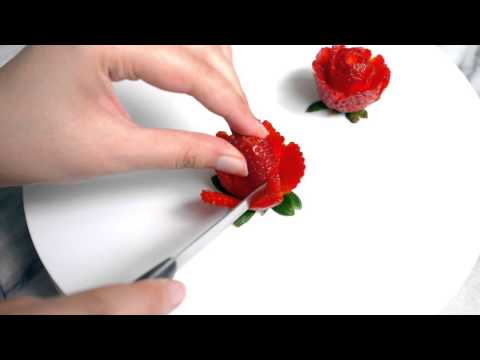
Creating a strawberry–rose/” title=”How To Make A Strawberry Rose”>strawberry rose is a beautiful and delicious way to decorate any cake, cupcake, or pastry. This unique and eye-catching dessert is made from fresh strawberries that have been cut and formed into a shape resembling a rose. Making strawberry roses is surprisingly simple and the end result will be sure to impress. With just a few simple steps, you can make your own beautiful strawberry roses.To make a strawberry rose, you will need five to six large strawberries, a sharp paring knife, and a toothpick.
Begin by cutting off the top of the strawberry (the green part) and then slice it in half lengthwise.
Cut each of the two halves into thin slices, making sure to leave the stem intact. You should end up with four thin slices per strawberry.
Carefully fan out each slice and roll it up around itself starting from the outside inwards. Secure the rolled slice with a toothpick inserted through its center.
Repeat this process for each of the remaining slices until you have four “petals” for your rose. Take one final slice and roll it around all of the other petals, securing it with another toothpick if necessary. Finally, place the finished rose in a vase or on top of a cake as desired!
Preparing the Strawberries
Strawberries are a delicious and nutritious snack that can be enjoyed in many ways. Whether you’re making a strawberry jam, a smoothie, or just eating them raw, it’s important to take the time to properly prepare them. To get the most out of your strawberries, start by washing them thoroughly to remove any dirt or debris. Once the strawberries have been washed, cut off the tops and remove any stems before slicing them into smaller pieces. If you’re not going to be using the strawberries right away, store them in an airtight container in the refrigerator until you’re ready to use them.
When it comes time to use your strawberries, there are several different ways you can prepare them. If you’re making a jam or preserve, cook down the strawberries with sugar and lemon juice until they form a thick syrup. For a smoothie or shake, simply blend up some fresh berries with other ingredients like yogurt or ice cream for a refreshing treat. If you’re eating them raw, just sprinkle some sugar on top and enjoy! No matter how you choose to prepare your strawberries, you’ll be sure to have a delicious snack that’s both healthy and tasty.
Overview
This tutorial will guide you through the process of selecting the appropriate materials for a project. It will cover considerations for selecting the right type of material, as well as important factors to consider when choosing a specific material. With this information, you will be able to make an informed decision about which materials are best suited for your project.
Types of Materials
When selecting materials for a project, it is important to consider the type of material that is best suited for the task at hand. Different types of materials have different properties and can be better suited to different applications. Common types of materials include metals, plastics, ceramics, and composites. Each type has its own set of advantages and disadvantages that should be taken into account when making a selection.
Considerations When Choosing a Specific Material
Once you have decided on the type of material that is best suited for your project, there are several considerations that should be taken into account when making a selection from within that type. These considerations include cost, availability, performance characteristics such as strength and durability, environmental impact, and aesthetics. Each factor should be given due consideration when making a selection in order to ensure that the chosen material is the best possible option.
Required Materials
In addition to the type and specific material chosen for a project, it is also important to consider any other required materials that may be needed in order to complete it successfully. These could include adhesives or sealants needed for assembly or installation; fasteners such as screws or rivets; coatings or finishes; and other components such as cables or wires. Careful consideration should be given to these requirements in order to ensure that all necessary materials are available before beginning work on the project.
Introduction
Making a quilt is an enjoyable and rewarding experience. Quilting is a skill that can be mastered with practice, and the results are often unique and beautiful. In this guide, we will provide step-by-step instructions on how to make a quilt from start to finish. With patience and dedication, you’ll soon be able to create your own quilt masterpiece!
Materials Needed
Before you get started, there are certain materials that you’ll need in order to make your quilt. Fabric is at the heart of any quilt, so make sure to select fabrics that complement each other in color or pattern. You’ll also need a quilting ruler, rotary cutter, scissors, pins, thread, sewing machine, batting (or wadding), marking pencils or pens, and an iron.
Cutting the Fabric
Once you have all your materials ready, it’s time to begin cutting the fabric pieces for your quilt. Take each piece of fabric and fold it in half widthwise so that the right sides are together. Using your ruler and rotary cutter or scissors, cut out squares or rectangles depending on what shape blocks you want in your quilt.
Piecing Together the Blocks
Now that all of the pieces are cut out, it’s time to piece them together into blocks. Take two pieces of fabric and place them right sides together. Pin them at each corner and then sew along the edges using a straight stitch on your sewing machine. Once all the blocks are pieced together you can lay them out on a flat surface to get an idea of what they will look like when completed.
Adding Batting
The next step is adding batting (or wadding) between each layer of fabric. Place a layer of batting between two layers of fabric with right sides facing up. Make sure the batting is even throughout all layers before pinning them together at each corner.
Quilting
Now that everything is pinned together it’s time for quilting! Start by using a marking pencil or pen to draw lines across all layers where you want to sew them together. This will give you an idea of where to place your stitches during this step. Using a walking foot attachment on your sewing machine (if available), sew along these lines using either straight or decorative stitches.
Finishing Touches
The final step is adding finishing touches such as binding and labels if desired. Binding can be added by folding over one edge of fabric around all four sides and then pinning it down before sewing it into place with a straight stitch on your sewing machine. Labels can be added by hand stitching onto one corner of the quilt with embroidery thread.
ConclusionPlan Ahead
Careful planning is an important part of achieving your desired results. Take time to consider what you want to accomplish and how you’ll go about it. Consider what resources you have available and what might be needed to complete the task. Make sure to give yourself enough time to get the job done – rushing through a project can lead to mistakes and sub-par results.
Organize Your Work Area
Having an organized workspace can make a huge difference when it comes to getting the best results. Keep necessary supplies, tools, and materials within easy reach. Make sure there is plenty of room to work comfortably without worrying about tripping over things or having items in the way. Having everything organized will help you stay focused on the task at hand.
Choose Quality Materials
Using quality materials is essential for achieving great results. Don’t be tempted to cut corners with cheaper alternatives – they often don’t stand up as well and could lead to sub-par results. Investing in quality materials will pay off in the long run, as they tend to last longer and provide better performance.
Take Your Time
Rushing through a project can often lead to mistakes that could impact the end result. Don’t rush yourself and take your time when working on something – it’s always better to slow down and do things right than rush through them and end up having to do it again later due to mistakes or poor quality workmanship.
Test Before Finalizing
Before declaring a project finished, make sure you test it out first. This will help ensure that everything works properly and that there are no unexpected surprises when you go to use it for its intended purpose. Testing can also help identify any potential problems that need addressed before finalizing the project.

Alternatives to Strawberries
If you are looking for a fruity flavor that is similar to strawberries, there are a few alternatives you can try. One option is raspberries, which have a similar sweet and tart taste. They can be used in many of the same ways as strawberries, such as in jams, pies, and smoothies. Blueberries are another option that has a similar flavor profile. They are great for baking or adding to salads and yogurt.
Cherries are another option that have a sweet and tart flavor like strawberries. You can use them in pies or desserts, or add them to smoothies for a fruity flavor. Peaches also have a slightly sweet and tart flavor like strawberries, and they go well with desserts or yoghurt parfaits.
For those who want something completely different from strawberries, there are many other fruits to choose from as well. Apples have a crisp texture and sweet taste that is great for snacking or baking. Mangoes provide a tropical sweetness that goes well in smoothies or fruit salads. Bananas offer a creamy sweetness perfect for milkshakes and smoothie bowls.
Overall, there are many alternatives to strawberries if you are looking for something different or similar in flavor and texture. Whether it be raspberries, blueberries, cherries, peaches, apples, mangoes or bananas – you will be sure to find something that suits your taste buds!
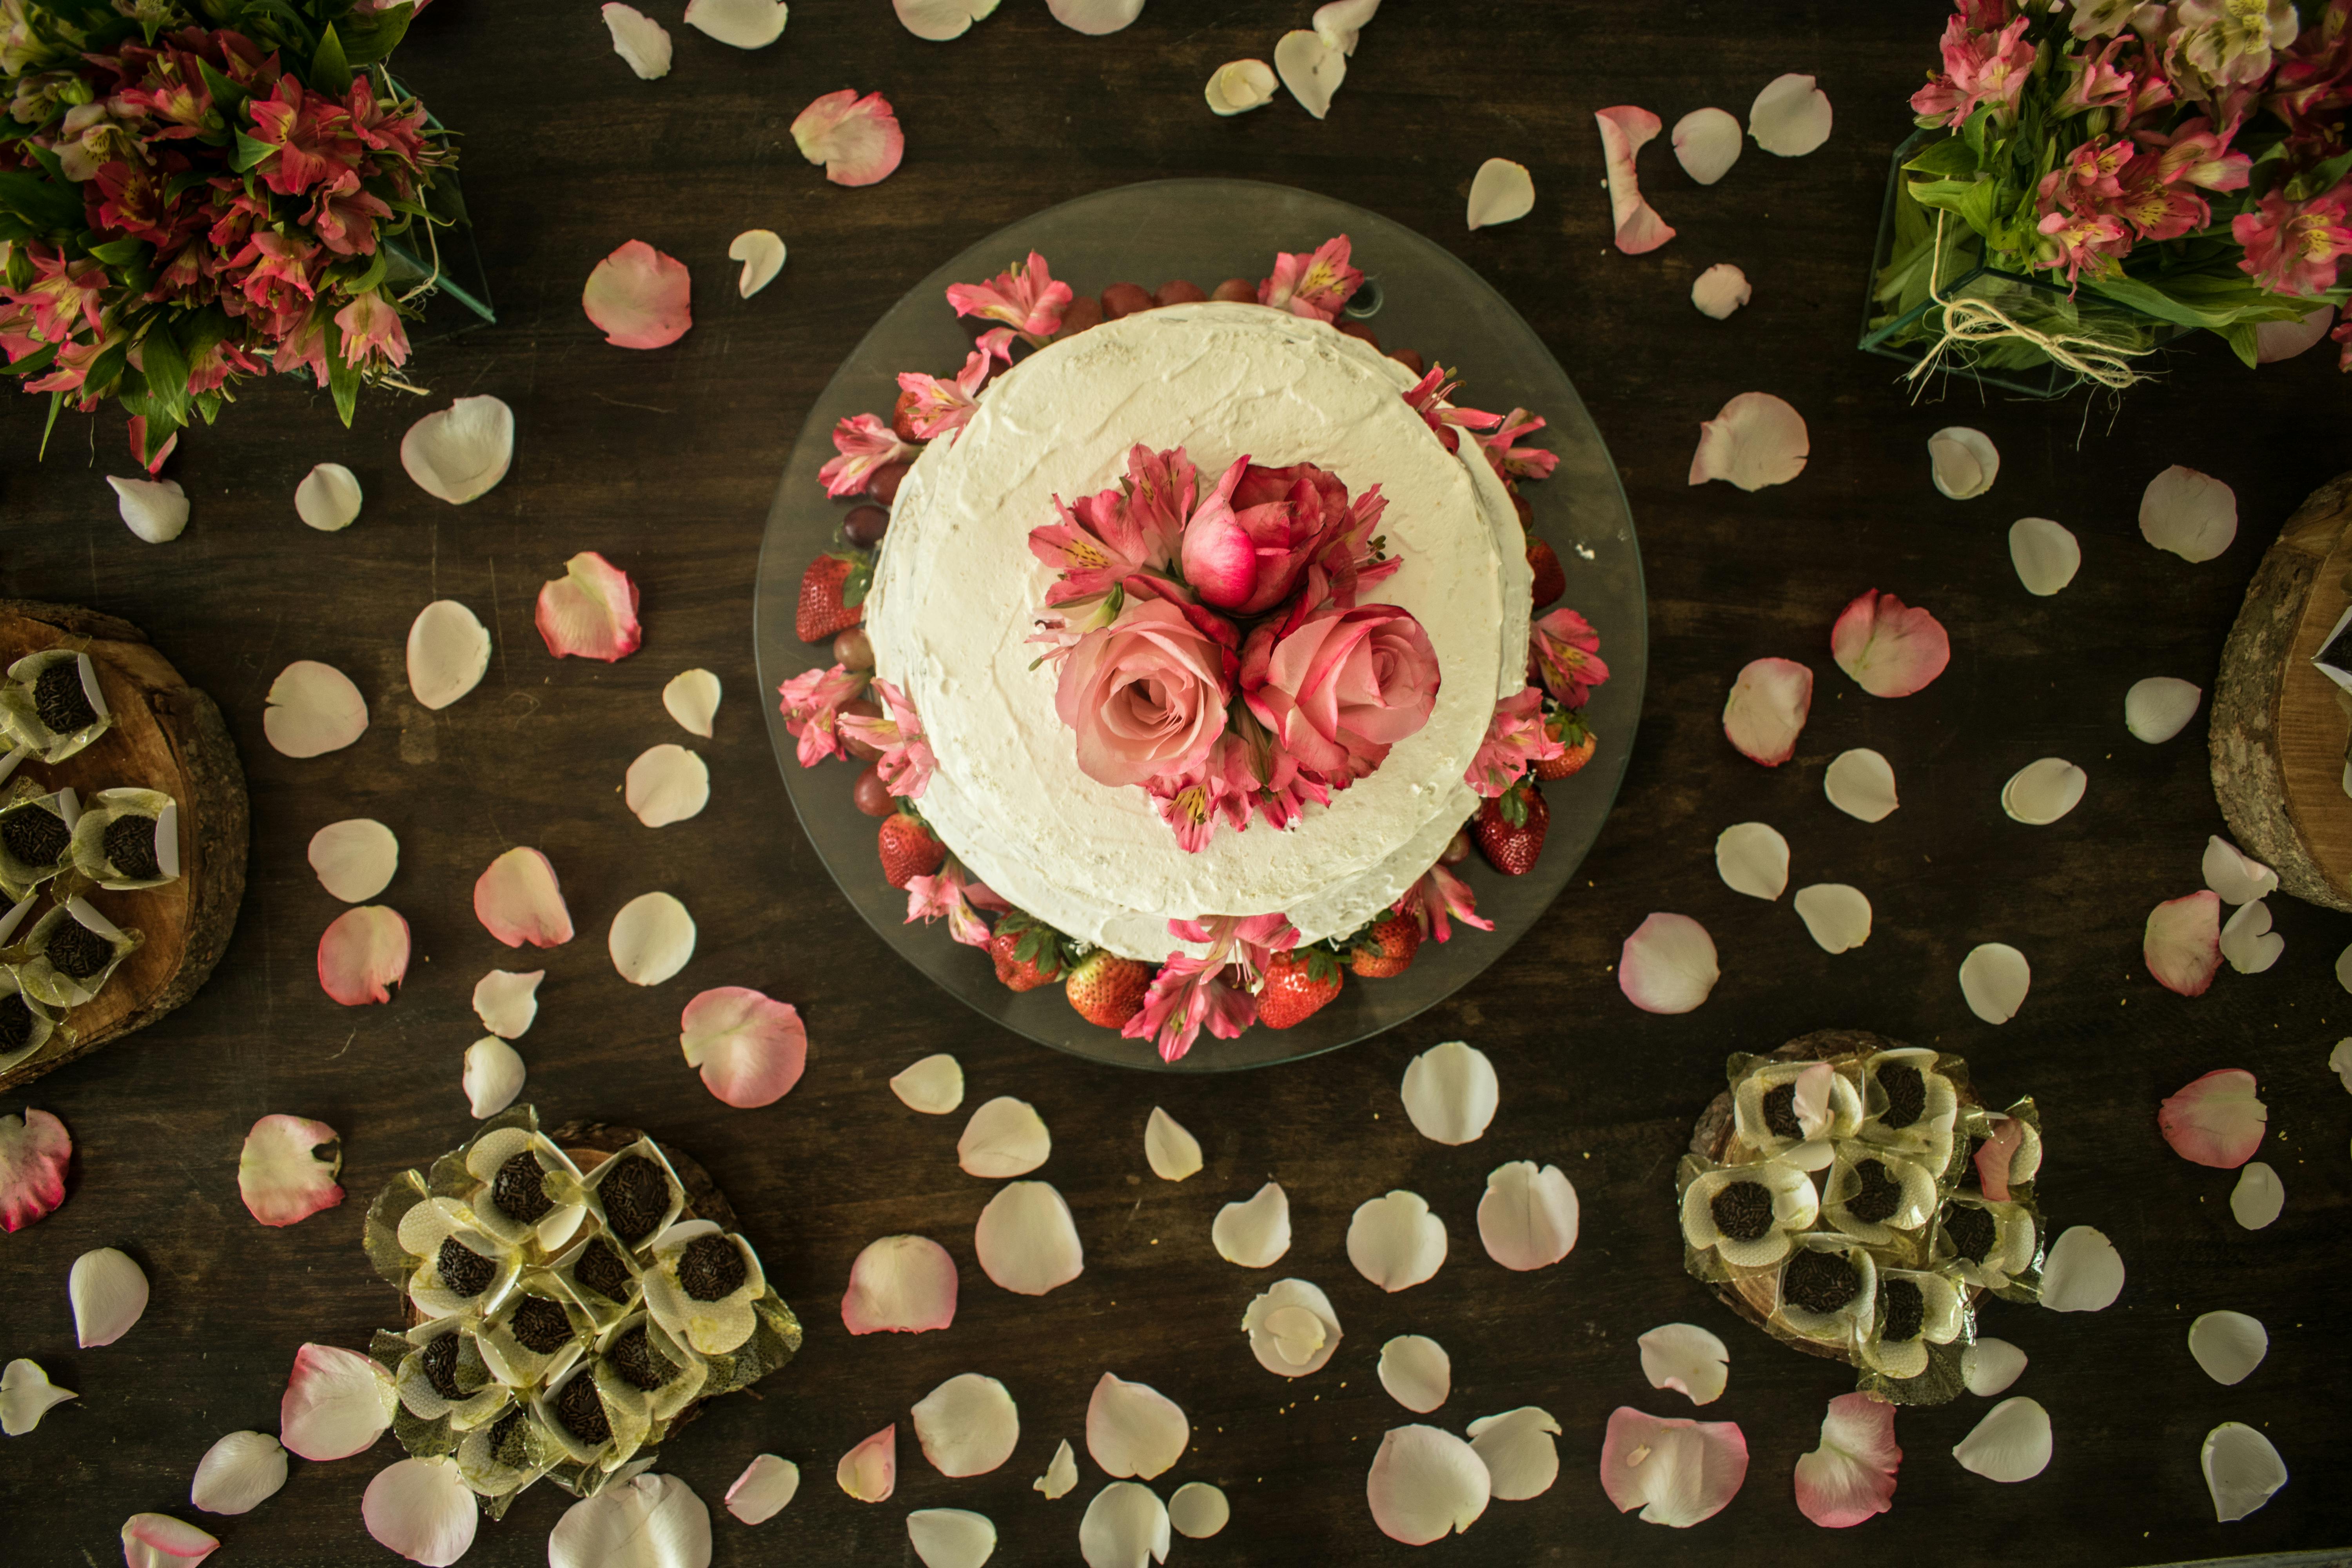
Strawberry Roses Decorating Ideas
Strawberry roses are a unique and beautiful way to decorate a room, especially for special occasions. They add a lovely touch of color and texture to any occasion, whether it be a wedding, birthday party, or other event. Strawberry roses are also very easy to make and require minimal materials. With just a few simple items, you can create stunning strawberry roses that will make any room look amazing.
The first step in creating your own strawberry roses is to select the perfect strawberries. Look for plump berries that have no signs of spoilage or mold. Once you have your strawberries ready, use a sharp knife to cut off the stem and top of the berry and then slice it in half lengthwise. This will create two petals that will form the base for your rose.
Using scissors, carefully trim each of the petals into hearts or petal shapes before arranging them onto a sheet of wax paper. You can then use food coloring or paint to give your roses their own colorful appearance. Once you have finished painting and arranging your strawberry roses on the wax paper, place them on top of an oven-safe cookie sheet.
To finish off your beautiful strawberry roses, bake them in an oven preheated to 350 degrees Fahrenheit for approximately five minutes until they are golden brown in color. When they are done baking, carefully remove them from the oven and let them cool before using them as decorations. They can be used as centerpieces on tables or as part of an overall decoration scheme throughout the room.
Strawberry roses are an easy and creative way to decorate any special occasion. With just a few simple materials and some creativity, you can create beautiful decorations that will bring joy to everyone who sees them!
Keeping the Strawberry Roses Fresh
Strawberry roses are a beautiful and unique decoration for any special occasion, but they can be tricky to keep fresh. Luckily, there are a few steps you can take to keep your strawberry roses looking great for longer. One way to keep them fresh is to store them in a cool, dry area with good air circulation. This will help prevent them from getting too warm or too moist, which can cause the petals to wilt and brown. Additionally, you should mist the rose petals with water every few days to keep them hydrated and looking vibrant. Finally, if you’re planning to keep your strawberry roses for more than a week or two, it’s best to place them in the refrigerator overnight each night. This will help slow down the aging process and preserve their beauty for much longer. With these simple tips, you can enjoy your strawberry roses for weeks!
Conclusion
Making a strawberry rose is a simple, fun, and delicious way to decorate your cakes and desserts. With just a few basic tools and supplies, you can easily create beautiful strawberry roses that will add the perfect touch to any occasion.
The process is straightforward: first, you’ll need to cut the strawberries into thin slices. Next, arrange the slices in petal-like circles around a central point. Finally, use toothpicks or skewers to hold the petals together to create the rose shape.
Making strawberry roses is a great way to get creative with your baking and impress your friends and family with your custom dessert designs. So why not give it a try? With some practice, you’ll be creating beautiful edible works of art in no time!

