Drawing a strawberry can be a fun and rewarding activity. In this tutorial, we will show you how to draw a realistic strawberry step by step. We will go over the basics of drawing, shading and coloring to create an effective and realistic strawberry. With practice and patience, you will be able to make your own beautiful strawberries in no time!To draw a strawberry, you will need a pencil, eraser, paper, and a reference image of a strawberry. You may also find it helpful to have colored pencils or markers so you can add color to your drawing.
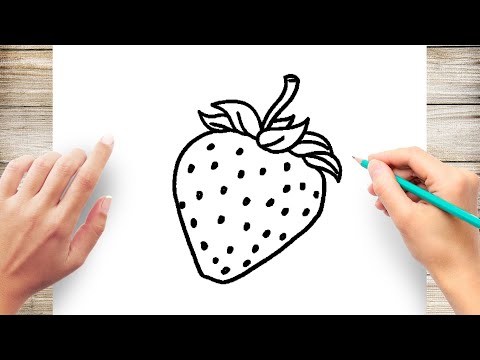
Draw The Outline Of The Strawberry
Drawing the outline of a strawberry can be a great way to get started when creating a strawberry illustration. To begin, start by drawing an oval shape with a pointed bottom and curved top. This will form the basic structure of the strawberry. Next, draw two curved lines from the top of the oval downwards into the center of the strawberry shape. These lines will form the indentation in the middle of the strawberry and will help give it its characteristic shape. Finally, draw five short lines radiating outwards from each side of the oval to create an uneven pattern that resembles a strawberry’s ridges.
Once you have drawn the outline of your strawberry, you can start adding details such as leaves and seeds. For leaves, draw small curved shapes at the top of your strawberry shape and for seeds, draw small dots or circles around the edges of your outline. When you are finished, you should have a basic illustration that looks like a realistic strawberry!
Draw The Seeds Of The Strawberry
Drawing the seeds of a strawberry can seem like an intimidating task, but it doesn’t need to be. All you need is a steady hand, a sharp pencil, and some patience! Start by sketching out the overall shape of the strawberry. This can be done by lightly outlining the top and bottom of the berry. Then, draw in the indentations that make up the strawberry’s ridges. Next, create small lines inside each ridge to form individual seeds. Make sure to make each seed slightly different from its neighbors for a more natural look. Finally, use your pencil to lightly shade around each seed in order to give it a realistic texture.
Once you have finished drawing all of your seeds, you can add in some smaller details by drawing tiny veins or adding in white highlights. These touches will help bring your drawing to life and give it a more accurate representation of how a real strawberry looks. With practice and patience, you’ll be able to draw beautiful strawberries with ease!
Strawberry
A strawberry is a small, red, sweet, juicy fruit. It is one of the most popular fruits in the world and comes from the same family as raspberries and blackberries. Strawberries are low in calories but high in vitamins and minerals. They are also rich in antioxidants, which can help protect against diseases such as cancer. Strawberries are a delicious and healthy snack that can be eaten fresh or added to smoothies, salads, and other dishes.
Step 1 – Clean The Strawberry
Before you begin adding color to your strawberry, it’s important to make sure it is clean. Start by rinsing off the strawberry in cold water to remove any dirt or debris that may be on the surface. You can then use a soft cloth or brush to gently scrub away any stubborn dirt or residue that may be on the strawberry. Once the strawberry has been cleaned, pat it dry with a paper towel before moving onto the next step.
Step 2 – Prepare The Strawberry
Once you’ve cleaned your strawberry, you’ll need to prepare it for coloring. This involves cutting off any stems or leaves that may be attached to the strawberry and also removing any blemishes or imperfections from its surface. You’ll want to make sure there’s as much surface area as possible for your color to adhere to later on.
Step 3 – Add Color To The Strawberry
Now that your strawberry is clean and prepared for coloring, it’s time to add some color! Using food coloring or edible paint, start by lightly coating one side of the strawberry with your chosen color. Allow this first layer of color to dry before adding additional layers until you reach your desired result. If needed, use a brush or cotton swab to get into all of the nooks and crannies of the strawberry for even coverage.
Once you’re happy with how your colored strawberry looks, allow it time to completely dry before eating or serving!
Step 1 – Draw The Outline of the Strawberry
To begin drawing a strawberry, start by lightly sketching an oval shape with pointed ends at the top. This will form the outline or silhouette of your strawberry. Once you are satisfied with your outline, you can move onto the next step.
Step 2 – Add Details on The Outline
Next, add details to your outline by drawing four curved lines around the circumference of the oval shape. These curved lines will give your strawberry more depth and dimension. You can also add small circular shapes on either sides of the oval to represent the seeds on a real life strawberry.
Step 3 – Color The Strawberry
Now it’s time to color in your strawberry! Use bright shades of red to give it a realistic look. If you want to make it look even more authentic, you can add some pink and white tones as well to give it highlights and shadows. You can also use different shades of green for the stem and leaves at this stage.
Step 4 – Shade The Strawberry For Depth
Finally, it’s time to shade your strawberry for added depth and realism. Start by darkening up certain areas such as around the seeds or any other areas that would be naturally darker in a real life strawberry. You can also use lighter shades to create highlights in certain areas such as around the edges of the leaves or stem. This will help create a 3-dimensional look for your artwork!

Step 1 – Start With a Light Green Circle
Start by drawing a light green circle in the middle of your paper. This will be the base of the strawberry. Make sure it’s not too big or too small – you want it to look realistic. From here, use a black marker to draw a thin line around the edge of the circle. This will help define the shape and outline of the strawberry.
Step 2 – Outline The Top Of The Strawberry
Now use your black marker to draw another line along the top edge of the circle. This should create an oval shape – make sure that it’s curved and not straight. This will be the top part of your strawberry. You can also add a few small lines connecting this shape to your original circle – these will add texture and detail to your drawing.
Step 3 – Add Dots To The Strawberry
Using your black marker, add several dots around the edge of the strawberry. These dots should be evenly spaced out and not too big or too small. They should look like small seeds and they will help create an interesting texture for your drawing.
Step 4 – Color In The Strawberry
Using a red colored pencil, color in the entire strawberry except for the green base. Make sure that you color in all of those little dots that you added in step three as well! You can also use different shades of red if you want to make it look more realistic.
Step 5 – Add Final Details To The Strawberry
To finish off your strawberry drawing, use a brown colored pencil to add some shading around the edges and on some parts of the berry itself. You can also go back over some areas with darker colors if you want them to stand out more. Finally, use white pencil or pen to add highlights throughout your strawberry drawing!
Gathering References
When it comes to drawing a realistic strawberry, the most important step is to gather reference images. When drawing from life, this might mean going to the store and buying some fresh strawberries, or finding photos online. It’s important to make sure that the images you are looking at have good lighting and detail, as these will help you create a more realistic drawing.
Understanding Proportions
Once you have your references ready, it’s time to start thinking about proportions. To create a realistic strawberry, you’ll need to understand how the different parts of the fruit fit together. Start by sketching out the overall shape of the strawberry, paying attention to the size of each part in relation to each other. This will help you achieve more accurate proportions in your final drawing.
Adding Details
Once you’re happy with the overall shape and proportions of your strawberry, it’s time to start adding details. Pay attention to things like texture and shadows. Notice how light creates highlights and shadows on different parts of the fruit and try to capture this in your drawing. Also consider things like bumps and creases that give each strawberry its unique character.
Finishing Touches
Finally, don’t forget about little finishing touches such as highlights or small details that can really make your drawing pop. Once you’re satisfied with your work, sign it off with a signature or date so that people know it’s yours! With practice and patience, soon enough you’ll be able to draw realistic strawberries with ease.
How To Make Your Drawing Look Lifelike
Creating lifelike drawings can be a difficult task, but with some practice and the right techniques, you can achieve realistic results. Drawing realistically requires an understanding of perspective, lighting, and texture. Additionally, it is important to pay attention to detail, have patience, and be willing to practice. Here are some tips to help you make your drawings look lifelike:
Perspective: Perspective is an essential part of creating a realistic drawing. Pay attention to the vanishing point of your drawing and how objects appear further away or closer up. Additionally, consider the size of objects relative to each other as they appear in the background or foreground.
Lighting: Lighting can drastically change how your drawing looks. Pay attention to where the light source is coming from and how it affects the shadows in your drawing. Consider different light sources such as natural sunlight or artificial lights like lamps or candles.
Texture: Texture is an important element in making a drawing look more realistic. Consider the textures of different surfaces such as fabric, wood, paper, etc., and draw accordingly. You should also pay attention to details like wrinkles or brush strokes when adding texture to your drawings.
Detail: Details are essential when trying to make a drawing look lifelike. Pay close attention to small details like skin pores, individual strands of hair, wrinkles in clothing or fabric, etc., and try to add them into your drawing as much as possible.
Creating lifelike drawings can take some time and practice but it’s worth it in the end! With these tips in mind you will soon be on your way to creating beautiful realistic art pieces!

Conclusion
Drawing a strawberry is not only fun but also an incredibly rewarding exercise. It can be done with a few simple steps using basic shapes and details. With practice, you can create a realistic representation of a strawberry in any size or shape. With this guide, you now have the knowledge to draw a strawberry with ease!
So, grab your pencil and paper and get ready to draw your favorite fruit – a strawberry! You’ll soon find that it’s not as difficult as it looks. And who knows – you may even find yourself creating stunning works of art!

