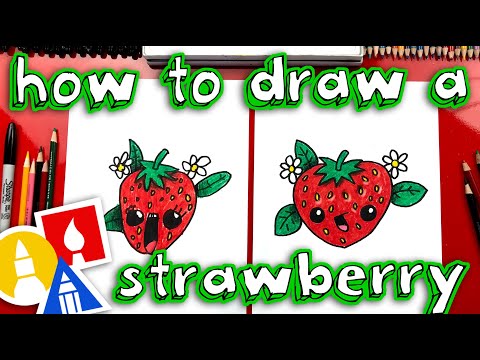
Drawing a cute strawberry is an easy and fun activity that can be enjoyed by both children and adults alike. With a few basic supplies, you can create a realistic-looking strawberry in no time! This tutorial will take you through the steps of drawing a cute strawberry, while providing helpful tips along the way. So get your pencils and paper ready and let’s get started!Step 1: Begin by drawing a circle with an oval shape at the bottom.
Step 2: Add two small circles to the top of the oval for the strawberry’s seeds.
Step 3: Draw a curved line that connects the two circles and is slightly below them. This will be the top of the strawberry.
Step 4: Draw a curved line that connects the two circles again, this time slightly above them. This will be the bottom of the strawberry.
Step 5: Draw a curved line connecting both sides of your strawberry shape, and then add some details on it, like small lines or bumps, for texture.
Step 6: Add some leaves at the top of your strawberry by drawing two curved lines that meet in a point.
Step 7: Color in your strawberry and leaves with red and green colors to make it look realistic!
What You’ll Need for Drawing a Cute Strawberry
Drawing a cute strawberry can be a fun and easy activity. All you need is a few simple supplies and some basic knowledge of drawing techniques. To get started, you’ll need paper, pencils, erasers, and colored pencils or markers. Pencils are best for sketching the shapes and outlines of your strawberry before adding color. You’ll also need an eraser to make corrections or erase mistakes as you draw. Colored pencils or markers will add the final touches to your strawberry by adding shading and color.
Once you have all the supplies ready, it’s time to start drawing! Begin by sketching out the basic shapes of your strawberry. Start with an oval for the body of the fruit, then add two circles for the seeds on top. Next, draw curved lines around the shape of your strawberry to give it more definition and texture. Finally, add any details you would like such as leaves or stems at the top.
When all of your sketches are complete, it’s time to add color! Use colored pencils or markers to bring your strawberry to life by adding shading and texture to its surface. For example, try using lighter shades of red in areas where light would hit and darker tones in areas that would be in shadow. You can also experiment with different colors such as blue or green to make your strawberry even more unique!
Outline the Shape of the Strawberry
Strawberries are widely known for their heart-shaped form and juicy texture. The shape of a strawberry is typically divided into two parts: the calyx at the top and the body below it. The calyx is a cup-like structure that resembles a flower and is made up of green sepals that extend around the stem. It is usually slightly pointed at the top and can have anywhere from five to ten notches or points. Below this sits the body, which has a wide, conical shape with ridges and dimples on its surface. The stem is connected to the center of the calyx and extends down into the bottom part of the body, where it meets an indentation known as the navel or “crown”. The strawberry’s bright red color comes from carotenoid pigments, which are found in all parts of this fruit except for its white seeds.
Ultimately, when looking at a strawberry from above, one can easily make out its characteristic heart-shape form with a pointed tip at one end and a broad base at the other end. This shape makes strawberries easily recognizable in markets and gardens all around world.
Shape
A strawberry has a distinct shape that sets it apart from other fruits. It is typically oblong or conical in shape with a pointed tip and tapered sides. The top of the strawberry is slightly curved, giving it an overall heart-like shape. The strawberry’s exterior has small, faint ridges which help to give it a unique texture. At the base of the strawberry are several leaves that can range in color from pale green to deep red.
Color
The most striking feature of the strawberry is its vibrant red color. This bright hue often appears deeper near the base and lighter near the tip of the fruit. While there may be hints of yellow or orange, true strawberries are usually only red in color.
Texture
The outer skin of the strawberry has a slightly bumpy texture, which comes from its faint ridges and small seeds. These seeds are also known as achenes, and they give the fruit its unique flavor and crunchy texture when eaten. The interior of the strawberry is soft and juicy, making it a delicious snack to enjoy anytime!
Size
Strawberries vary in size depending on their variety and age when harvested. Generally speaking, strawberries are about 2-3 centimeters (or 1 inch) in diameter at their widest point. They can range from tiny berries to larger ones that weigh an ounce or more each!
Adding Color and Shading to the Strawberry
Adding color and shading to a strawberry can be an enjoyable way to practice your artistic skills. Whether you are a beginner or an experienced artist, adding shading and color to a strawberry can be a great way to improve your technique.
When beginning your project, decide what kind of color palette you want to use. You may choose bold and vibrant colors or more muted tones. You may also choose to add texture with markers or colored pencils. Experiment with different materials until you find what works best for you.
Once you have chosen your colors, it’s time to start shading the strawberry. Start by adding light shades of color and gradually darken the shadows and highlights as you work around the fruit’s contours. This will help give the strawberry more dimension.
You can also use highlights and shadows to create depth in your artwork. Try using darker shadows in the crevices of the strawberry, followed by lighter shades around its curves for added effect. You can also add shading on its leaves and stem for extra realism, if desired.
Finally, finish off your artwork with some details such as seeds or veins on the surface of the strawberry for an even more realistic look. With some patience and practice, you will be able to create beautiful pieces of art that feature strawberries in all their vibrant glory!
Draw Leaves and Stem of the Strawberry
Drawing the leaves and stem of a strawberry is quite easy. First, draw a small triangle that will form the base for the leaves. Then, draw curved lines around the triangle to form the shape of the leaves. Finally, draw a stem at the top of the triangle. The stem should be drawn as an elongated curved line with small bumps to show texture. To add more details to your drawing, you can draw small veins on the leaves and add some shadows as well. When you’re done, your strawberry should look realistic and detailed.
When drawing a realistic strawberry, it’s important to remember that strawberries have different shapes and textures depending on their variety. Some are more rounded while others may be elongated or even pointy. You can also vary up textures by adding more details such as bumps or veins on your leaves and stem. This will help make your drawing look more realistic and give it that signature strawberry look!
Add Final Touches to Your Cute Strawberry Drawing
Adding the final touches to your cute strawberry drawing will make it look even more adorable! Start by adding a stem on top of the strawberry. You can either draw it as a straight line or add curves and swirls to make it look more realistic. Then, draw small lines along the edge of the strawberry to create the ridges. Make sure you don’t overdo it, otherwise your drawing will look too busy.
Next, add some leaves on top of the stem. You can draw them with simple shapes like ovals or curved lines. To finish up, color in your strawberry with red and pink hues, using either colored pencils or markers. For a more realistic look, add some darker shadows around the edges of the strawberry and leaves. Finally, you can add some white highlights to give your strawberry an extra touch of realism!
Gathering Supplies
When it comes to drawing cute strawberries, the supplies you need are pretty basic – a pencil, eraser, and paper. If you have a ruler or other measuring devices, that can be helpful too. The more accurate your measurements, the better your drawing will look!
Getting Started
Start by sketching out a basic shape for your strawberry. It should be an oval with pointed ends on either side. Once you have the overall shape figured out, add detail and texture to make it look more like a real strawberry.
Adding Color
Once you’ve got the shape of your strawberry looking just right, it’s time to add color! Start by coloring in the entire strawberry red. You can use either crayons or colored pencils – whichever is easier for you. Then add darker shades of red in certain areas to give it dimension and make it look more realistic.
Finishing Touches
To finish off your cute strawberry drawing, add some white highlights with white gel pen or paint. This will give your strawberry extra shine and make it look even cuter! Finally, don’t forget to erase any stray lines or smudges that might have gotten onto your drawing while you were working on it.
Conclusion
Creating a cute strawberry with basic shapes and simple lines is easy to do and can be a good practice for aspiring artists. You can use the same technique to draw other fruits or objects. Drawing can be a great way to reduce stress, express your creativity, and have fun. Don’t be afraid to try out different techniques, styles, and colors as you explore your artistic side.
With the right materials and a few simple steps, you’ll be able to draw a cute strawberry in no time! Have fun drawing and don’t forget to share your creations with friends!

